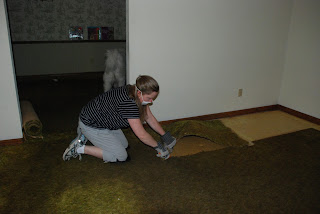
We had to remove the nasty old, old carpets quickly because the dogs wanted to roll on them. Yuck! These are not shadows, they are dirt and grime.
It felt slick walking on it. Note the contrast of the traffic area versus the furniture area to see the grime. Maybe this had something to do with how long the house sat on the market?
Here is another view.
Not sure what the grime consisted of, we wore masks while cutting it out. We sliced it into strips so we could easily carry it out to the garage.
The foam was no problem rolling up. It was not glued to the concrete like some builders do. The hind view is not the most pleasing, but given the type of work, most of our pictures ended up with the hind view in them.
That is not glue or adhesive. It is dirt. Who knew that much sand and dirt could filter through a carpet and sit on the concrete. Eew! It swept out easily enough. Then we used bleach to sanitize the floor.
Next we pulled up the tack boards that held the carpet in place. Kids did great work on that. We only got stuck a few times.
Next we painted the walls. After that dried, we put down the vapor barrier. Pop Pop came down to help. Knee pads helped a little, but after a week of this sore knees were part of the package. Buddy the dog supervised the work of the minions.
The phrase is measure twice, and cut once. Pop Pop takes notes on dimensions.
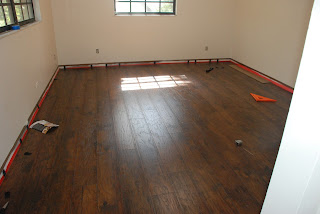
Then we connected all the boards and cut them down to size. In the end this bedroom looked like this. It took a little bit to get the hang of laying the flooring, but once we got going it was pretty easy in technique. It still took time to do.
The quarter round were attached to the base boards and painted glossy white. We think it looks better than the original carpets. Your feet may agree. The texture is much better too. This room took some of the 44 boxes of flooring needed for the house.


